

Ceiling and Wall Water Damage Repair in Chandler, AZ
A water stain on a ceiling or a wall is never just a stain. It is the visible end of a moisture path that runs through drywall, insulation, framing, and sometimes electrical and plumbing systems.
A water stain on a ceiling or a wall is never just a stain. It is the visible end of a moisture path that runs through drywall, insulation, framing, and sometimes electrical and plumbing systems. In Chandler homes, where air handlers sit in attics and monsoon storms drive rain into roof assemblies, ceiling and wall water damage is one of the most common and most underestimated losses. RestoreNov provides 24/7 emergency response for ceiling and wall water damage across Chandler and the East Valley. Call (480) 701-8249 now, especially if your ceiling is sagging or bulging, because a saturated ceiling can collapse.
Direct answer: Ceiling and wall water damage repair is the professional process of finding and fixing the water source, extracting water, opening and drying wall and ceiling cavities with moisture verification, removing unsalvageable drywall and insulation, and rebuilding with new drywall, texture matching, priming, and painting. A ceiling stain that is only painted over will bleed through again, because the moisture inside the assembly is still there. Repair starts with drying, and drying is verified with meters, not assumed from appearance.
What Happens When You Call
Calling starts a short, plain process. The three steps below describe what happens from the first call to a finished job.
Step 1 - Call and assessment. You describe where the stain, sag, or bulge is, what water event came before it, and whether the ceiling is sagging. The person who answers asks about the rooms below and above the damage, the water source if you know it, and whether the area is safe to stay out of. That information shapes the inspection and the first steps on arrival.
Step 2 - Inspect and open up. On arrival, the crew checks moisture in the ceiling and wall assemblies, finds the water path, and opens the smallest area needed to reach wet insulation and framing. Wet materials that cannot be saved are removed, and the open cavity is set up for drying.
Step 3 - Repair and verify. Once moisture readings show the cavity is dry, the wall or ceiling is rebuilt with new drywall, matched texture, primer, and paint. The crew walks the area with you, shows the dry readings, and notes what to watch for in the days after the job.
Why Ceilings and Walls Are Different From Floors
Floor water damage is visible. You see the puddle, you feel the wet carpet, and you know where the water is. Ceiling and wall water damage is hidden. The water is inside an assembly: drywall on one side, insulation and framing in the middle, and drywall, sheathing, or roofing on the other side. The visible stain is the last place the water shows up, not the first place it went, and the visible stain almost always understates the real scope.
Three properties of ceiling and wall assemblies make them different.
Gravity works against you in ceilings. Water that enters a ceiling cavity pools on top of the ceiling drywall, saturates the insulation above it, and loads the drywall with weight. Drywall loses strength as it saturates, and a saturated ceiling panel can sag, bulge, and collapse under its own weight plus the weight of wet insulation. A sagging ceiling is a structural warning, not a cosmetic problem.
Capillary action works against you in walls. Drywall wicks water upward through capillary action, so the water line inside a wall is higher than the water line on the floor. Water inside a wall cavity also travels sideways along framing and baseboards, so the wet area inside the wall is wider than the stain on the surface.
Insulation hides and holds water. Fiberglass batt insulation inside a wall or ceiling cavity absorbs water, compresses under its own wet weight, and dries slowly and unevenly. Wet insulation loses insulating value, and it holds moisture against framing and drywall for days after the surface looks dry. In many ceiling and wall jobs, insulation removal is what allows the cavity to dry at all.
These three properties are why ceiling and wall water damage requires opening the assembly, not just drying the surface. A crew that dries the surface and paints over the stain has left the cavity wet, and the job will return as mold, odor, and a stain that bleeds through the new paint.
What This Service Covers
Ceiling and wall repair covers the full path from a wet, stained assembly to a dry, finished surface. The list below describes the work that is part of this service.
- Moisture inspection of ceilings, walls, and the cavities behind them to map where water traveled
- Opening of wet ceiling and wall assemblies to reach soaked insulation and framing
- Removal of drywall and insulation that cannot be dried or cleaned
- Drying of open cavities with moisture readings taken before rebuild
- Rebuilding with new drywall, matched texture, stain-blocking primer, and paint
- Checks of nearby rooms and assemblies where the same leak may have spread
The Most Common Causes in Chandler Homes
AC Condensate Ceiling Leaks (Attic Air Handlers)
This is the most Chandler-specific cause of ceiling water damage, and one of the most common. Air conditioners in Chandler run most of the year, and every hour they run they pull moisture out of the indoor air. That moisture collects on the evaporator coil and drains away through a condensate drain line, usually a white PVC pipe. When that line clogs with algae, dust, or debris, the drip pan overflows. In many Chandler homes the air handler sits in the attic, so an overflowing pan sends water straight down through insulation, ceiling drywall, and flooring below.
AC condensate ceiling damage has a specific pattern. It often appears in a room that is not used every day, such as a guest room, an office, or a hallway, because the leak runs quietly until someone notices the stain or the drip. The stain often appears far from the air handler, because water travels along attic framing and insulation before it drips through the ceiling. The ceiling cavity above the stain often holds far more water than the stain suggests, because insulation absorbed water for days before the ceiling surface showed anything.
Warning signs include water pooling near the indoor unit, a stain or active drip on the ceiling below an attic unit, a musty smell from the vents, standing water in the drain pan, and an AC that shuts itself off because the float switch tripped. The float switch is a safety device that shuts the system down when the drain pan fills. A tripped float switch means the drain line is clogged and the pan was about to overflow, or already has.
AC condensate repair is two jobs. An HVAC technician clears the drain line, services the drain pan and float switch, and restores the system. The restoration crew handles extraction, cavity drying, removal of unsalvageable drywall and insulation, and repair. Both jobs are needed, and they should be scheduled at the same time. Drying should not start until the drain line is cleared, or the ceiling will simply get wet again.
Roof-Leak Ceiling Stains
Monsoon wind-driven rain, cracked tile, failed flashing around vents and chimneys, and clogged roof drains let water into the attic. Roof leak damage often appears as a ceiling stain far from the actual entry point, because water travels along rafters and roof decking before it drips down. A stain in a bedroom may trace back to a failed flashing joint twenty feet away, or to a roof valley that ponds water during a storm.
Roof leak ceiling stains have a specific pattern. They often appear or darken after a storm, then lighten during dry weather, which tempts homeowners to assume the problem went away. It did not. The insulation above the stain stayed wet, the framing stayed wet, and the drywall core stayed wet, even though the surface dried. Each storm re-wets the same assembly, and the damage compounds: drywall softens, framing stays damp, and mold risk rises with every cycle.
Roof leak repair is also two jobs. A roofer fixes the entry point: the flashing, the tile, the valley, or the drain. The restoration crew handles extraction, cavity drying, removal, and repair. The roofer's job comes first, because drying a ceiling under an active roof leak wastes the drying effort. Call both at the same time, and let them coordinate timing.
Burst Pipes and Plumbing Leaks in Walls and Ceilings
Supply line failures, fitting failures, and corroded pipes inside walls and above ceilings release clean water directly into the assembly. A pipe that fails inside a wall saturates drywall, insulation, and framing in that wall, then spreads to adjacent rooms. A pipe that fails above a ceiling saturates ceiling drywall and insulation, then drips into the room below. The full plumbing failure picture is on the burst pipe and slab leak page. The ceiling and wall repair sequence below applies to plumbing-caused damage the same way it applies to AC and roof causes.
Slab Leaks and Wall Bases
A slab leak saturates the bottom of walls, where drywall meets the slab. The visible sign is often a damp baseboard, a musty smell near the floor, or paint bubbling at the bottom of a wall. The moisture migrates up through the drywall by capillary action, so the wet area inside the wall extends above the visible sign. Wall base repair after a slab leak commonly involves removing baseboards, opening the lower wall, removing wet insulation, and drying the cavity and the slab edge. See the burst pipe and slab leak page for detection and plumber coordination.
Flood and Sewage Wall Damage
Floodwater and sewage water that enter a home soak the lower portion of every wall they touch. Flood cuts remove the contaminated lower drywall, expose the cavity, and allow cleaning, sanitization, and drying. The flood sequence is on the flood damage restoration page, and the sewage sequence is on the sewage cleanup page. The wall repair sequence below applies after the flood or sewage steps are complete.
Appliance Leaks That Reach Walls
Dishwasher leaks, refrigerator ice maker line leaks, washing machine hose failures, and reverse osmosis drain leaks saturate the wall behind the appliance and the wall bases of adjacent rooms. The visible sign is often in the next room, not in the room with the appliance, because water traveled through the wall cavity or under flooring. Moisture mapping finds the full extent, including the room you did not think was affected.
Sagging Ceiling Safety: Call Immediately
A sagging or bulging ceiling is an emergency, and it is the one ceiling symptom that should never wait.
A ceiling sags because saturated drywall has lost strength and is carrying the weight of wet insulation and trapped water. The sag means the panel is close to failure. A saturated ceiling panel can collapse without warning, dropping wet drywall, wet insulation, and trapped water onto the room below. The falling material is heavy, and the water can carry contaminants, especially after a roof leak or an AC overflow that has been running for days.
If your ceiling is sagging or bulging, do this now:
- Stay out of the room. Do not stand under the sag, do not push on it, do not poke it, and do not try to drain it by punching a hole. Poking a sagging ceiling releases the trapped water and can trigger a collapse.
- Move people, pets, and valuables out of the room. Do not re-enter to retrieve items from under the sag.
- Switch off power to the room if you can do it safely. Do not stand in water to reach a switch. If the sag is near a light fixture, a ceiling fan, or wiring, the electrical risk is real.
- Call (480) 701-8249 immediately. Tell the dispatcher that the ceiling is sagging. The crew will prioritize the call and advise you on safety until they arrive.
- If the ceiling collapses before the crew arrives, stay out of the room. Do not enter to assess the damage. Wait for the crew.
A ceiling that is stained but flat, with no sag and no bulge, is still urgent, but it is not the same emergency as a sagging ceiling. A flat stain means the ceiling is wet. A sag means the ceiling is failing. Treat them differently, and treat a sag as an immediate call.
The Ceiling and Wall Repair Sequence
Ceiling and wall water damage repair follows a fixed sequence. Each step depends on the step before it, and skipping a step leaves moisture behind.
- 1. Emergency call and source control. Your call is answered live, 24 hours a day. The crew confirms the water source is stopped or helps you stop it. If the source is a plumbing failure, a plumber is called. If it is an AC condensate overflow, an HVAC technician is called. If it is a roof leak, a roofer is called. The restoration crew can begin protection and extraction work while the trade repair is scheduled, and drying begins once the source is controlled.
- 2. Safety check. The crew checks for a sagging ceiling, electrical hazards, and structural hazards. Rooms with a sagging ceiling are restricted. Power to affected rooms is switched off where water is near electrical equipment. For sewage-contaminated wall damage, protective equipment and containment come first.
- 3. Inspection and moisture mapping. The crew inspects every affected ceiling and wall, plus the rooms next to and below them. Moisture meters measure saturation in drywall, framing, and subfloor. Thermal imaging cameras reveal temperature differences that point to hidden moisture inside cavities and above ceilings. The crew maps the full extent of the moisture, including the high-water line inside walls and the wet area above ceilings, and writes a scope of work before any cutting begins.
- 4. Water extraction. Standing water on floors is removed with submersible pumps and extractors. Water trapped in ceiling cavities is released through controlled openings, not by poking the ceiling. Water in wall cavities is extracted through controlled openings at the base of the wall. The full extraction sequence is on the emergency water extraction page.
- 5. Controlled opening and flood cuts. Drywall that has lost structural integrity, or that is contaminated, is cut out in a controlled way. In walls, the standard technique is a flood cut: a horizontal cut at a measured height above the water line, so the wet lower portion is removed and the cavity behind it can be dried and cleaned. In ceilings, the crew cuts out the saturated panel or section, removing wet insulation above it at the same time. Openings are sized to expose the full wet area, not just the visible stain, because the wet area inside the assembly is larger than the stain on the surface.
- 6. Removal of unsalvageable materials. Wet insulation is removed, because it dries slowly, compresses while wet, and holds moisture against framing and drywall. Carpet pad soaked with contaminated water is removed. Particle board and MDF that swelled are removed. Baseboards that absorbed water and separated are removed. These materials cannot be dried reliably in place, and leaving them in place means leaving moisture and contamination inside the assembly.
- 7. Drying wall and ceiling cavities. Commercial air movers and LGR dehumidifiers dry the opened cavities, with cavity drying systems pushing dry air directly into wall assemblies where needed. Technicians return daily to take moisture readings, reposition equipment, and record progress. Drying is complete when moisture meters confirm the framing, the remaining drywall, and the subfloor have reached their dry standard, not when surfaces feel dry. The full drying science is on the structural drying and dehumidification page.
- 8. Cleaning and sanitizing. Opened cavities are cleaned and treated with antimicrobial products. Hard surfaces are wiped and sanitized. After gray water or black water exposure, sanitization is a major part of the job. Air scrubbers with HEPA filtration run during and after this step to reduce airborne particles.
- 9. Mold prevention and monitoring. Fast, verified drying is the core of mold prevention. Published industry guidance says mold growth can begin in wet materials within 24 to 48 hours, and ceiling and wall cavities are high-risk locations because they are dark, still, and warm. Where mold growth is found, containment and remediation steps are added. The full mold sequence is on the mold remediation after water damage page, which covers mold as a consequence of water damage, not as a standalone service.
- 10. Rebuild: drywall, texture, prime, and paint. Once the structure is verified dry, new drywall is installed, seams are taped and finished, texture is matched, and the wall or ceiling is primed and painted. The rebuild sequence is covered in detail in the next section.
- 11. Final walkthrough and moisture verification. Before the job is closed, the crew walks the space with you, reviews the final moisture readings, and confirms the scope is complete. You receive the documentation package for your records and your insurance carrier.
Drying Wall Cavities: Why Opening the Wall Is Necessary
Many homeowners ask why the crew must open a wall that looks only slightly stained. The answer is that the stain is the surface, and the cavity is the problem.
A wall cavity is an enclosed space. Air does not circulate inside it. A household fan blowing on the outside of a wall does nothing for the inside of the cavity. A dehumidifier in the room dries the room air, not the cavity air. Without an opening, the cavity stays wet for days or weeks, while the surface dries and looks finished. Mold grows inside the cavity during that time, and the homeowner discovers it weeks later when a musty smell appears or a new stain shows.
Opening the wall, through a flood cut or a controlled opening, changes the cavity from an enclosed space to an accessible space. Air movers can blow directly into the cavity. Cavity drying systems can push dry air through it. The crew can see the framing, the insulation, and the extent of the moisture. The crew can remove wet insulation, clean the framing, and verify dryness with a meter reading inside the cavity, not a guess from outside.
The opening is repairable. New drywall, tape, texture, prime, and paint restore the wall. The cost of opening and repairing a wall is far less than the cost of leaving a cavity wet and discovering mold, rot, and a second, larger job weeks later.
Drywall Removal and Replacement
Drywall that has lost structural integrity, or that is contaminated, is removed rather than dried. The signs that drywall must be removed are: softness or crumbling when pressed, sagging or bulging, delamination where the paper facing separates from the gypsum core, visible mold growth inside the core, and contamination from gray water or black water. Drywall that is wet but still firm, with no contamination, can often be dried in place with cavity airflow, and the crew makes that judgment with meter readings, not by appearance alone.
Removal follows a controlled pattern. The crew cuts along straight lines, usually from stud to stud, so the replacement panel fits cleanly. Cuts are made with care around wiring, plumbing, and fixtures. Removed drywall is bagged and disposed of. The exposed cavity is inspected, cleaned, and dried. New drywall is cut to fit, screwed to framing, and finished with tape and joint compound. Seams are feathered so the repair does not show as a ridge or a hollow.
For walls, the standard replacement is a full-height or half-height panel, depending on the flood cut height. For ceilings, the standard replacement is a panel cut to fit between joists, with backing added where needed so the joint does not crack. Ceiling drywall is heavier and harder to finish than wall drywall, because gravity works against the installer and every imperfection shows in overhead light. Ceiling repair is not a job to rush.
Texture Matching: Why the Repair Must Not Show
Texture matching is what separates a professional repair from a visible patch. Chandler homes carry several ceiling and wall textures, and each requires a different technique.
Orange peel. The most common wall texture in Chandler homes. A fine, dimpled texture applied with a spray gun. Matching orange peel requires the right spray pattern, the right material consistency, and the right pressure. A patch that is too heavy or too light shows as a visible circle on the wall.
Knockdown. A heavier texture, sprayed on, then flattened with a trowel after a short set time. Knockdown matching requires the same spray pattern and the same knockdown timing, because timing changes the texture. A knockdown patch with different timing shows as a different pattern.
Popcorn or acoustic texture. Common on older Chandler ceilings. Popcorn texture is the hardest to match, because the aggregate size, the application thickness, and the age of the surrounding texture all affect the match. In some cases, the correct repair for a popcorn ceiling is to replace the full ceiling panel and retexture the entire ceiling, rather than patching a section, because a patch in popcorn almost always shows.
Smooth finish. Smooth drywall shows every imperfection. A smooth repair requires precise taping, feathering, sanding, and priming, because any ridge, hollow, or sanding mark shows in raking light. Smooth ceilings are the most demanding finish, and they are judged in daylight, not in work light.
Texture matching is followed by priming and painting. A stain-blocking primer is essential on any ceiling or wall that had water damage, because water stains bleed through regular paint. The primer seals the stain and the new drywall, and it gives the topcoat a uniform surface. The full ceiling or wall is repainted, not just the patch, because a spot paint job shows as a color and sheen difference, even with the same paint. The goal is a repair that never shows, and that goal requires the full sequence: dry materials, matched texture, stain-blocking primer, and a full repaint.
Why Painting Over a Water Stain Fails
Painting over a water stain is the most common do-it-yourself mistake after ceiling and wall water damage, and it always fails for the same three reasons.
First, the moisture is still inside the assembly. Paint on the surface does not dry the cavity behind it. The cavity stays wet, mold grows, and the stain returns through the new paint within weeks.
Second, water stains bleed through regular paint. The brown and yellow compounds in a water stain dissolve in water-based paint and migrate to the surface as the paint dries. The stain reappears, often darker than before. Only a stain-blocking primer, applied to a dry surface, seals the stain.
Third, the drywall underneath may be damaged. Paint over soft, delaminated, or mold-affected drywall hides the damage without fixing it. The drywall continues to degrade, and the paint peels, bubbles, or cracks as the surface fails.
The correct sequence is: fix the source, extract the water, open and dry the cavity, verify dryness with meters, remove unsalvageable materials, apply stain-blocking primer to a dry surface, and repaint the full ceiling or wall. Any shortcut in that sequence shows up later, and the later repair is larger than the original job would have been.
When To Call Immediately for Ceiling and Wall Damage
Call immediately if any of these apply:
- The ceiling is sagging or bulging. Stay out of the room and call now.
- Water is actively dripping through a ceiling or wall. The source is still flowing, and the assembly is still loading with water.
- The stain is growing, darkening, or spreading. Active moisture is still moving through the assembly.
- You hear dripping inside a wall or ceiling. Water is moving inside the assembly, and the source is still active or the cavity is still draining.
- You smell a musty odor near a wall or ceiling. Mold may be growing inside the cavity, even if the surface looks only slightly stained.
- The water is sewage. Stay out of the area, do not run fans or vacuums, and call immediately. See the sewage cleanup page.
- The damage followed a flood. Floodwater is Category 3 black water, and wall cavities need flood cuts, sanitization, and drying. See the flood damage restoration page.
Call promptly, even if none of the above apply, if you have a ceiling or wall stain after any water event. A stain that is investigated on day one is a drying job. The same stain ignored for a week can become a demolition, mold remediation, and rebuild job.
Areas We Serve in Chandler and the East Valley
We provide ceiling & wall repair across Chandler and the surrounding East Valley. Our address is 1651-1683 E Germann Rd, Chandler, AZ 85286, and our crews come to you.
Serving Chandler and the East Valley: Downtown Chandler, Ocotillo, Fulton Ranch, Sun Groves, Tumbleweed Park, Gilbert, Mesa, Tempe, Queen Creek, Sun Lakes, Ahwatukee, Higley.
We also serve homeowners in Andersen Springs, Pecos Ranch, Clemente Ranch, Fox Crossing, Cooper Commons, and Dobson Place.
Tools & Technology We Use
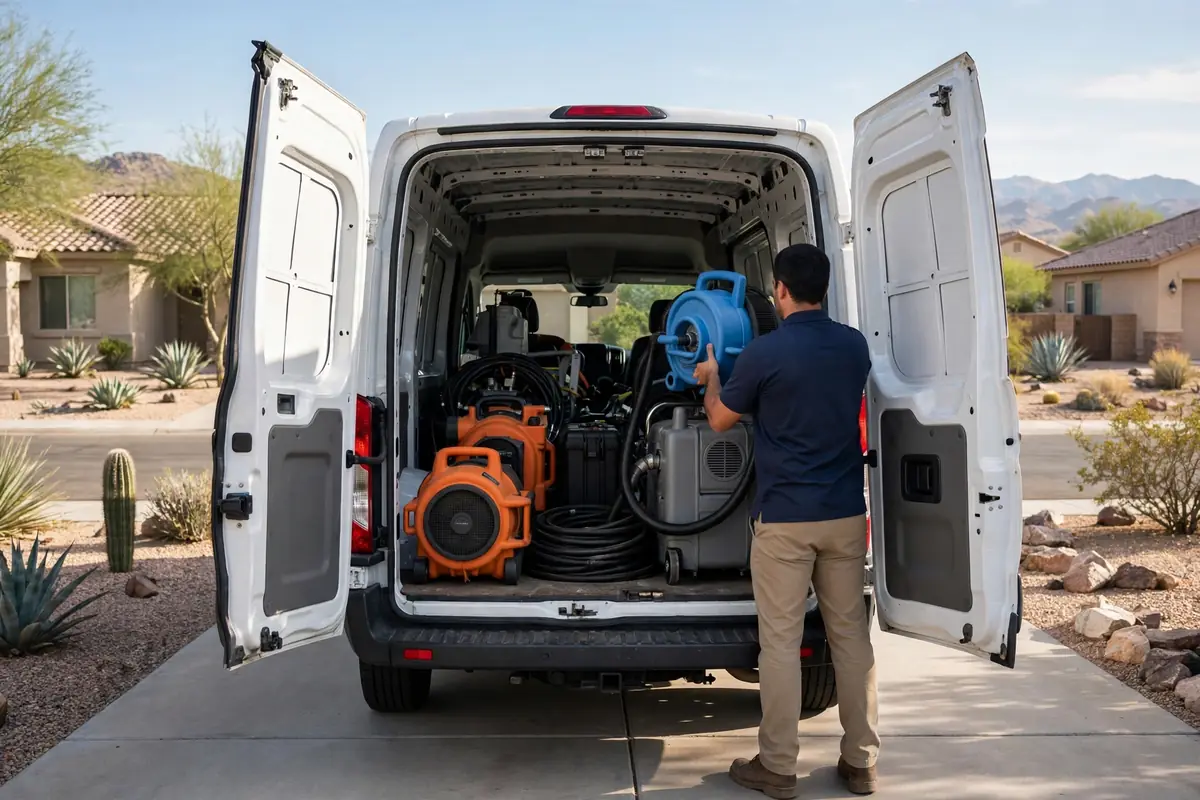
Ceiling and wall work is hidden work. Most of the damage sits inside an assembly, so the tools that matter most are the ones that find moisture, open the assembly cleanly, dry it, and make the repair blend in.
Moisture meters. Pin and pinless meters read moisture inside drywall, insulation, and framing so the crew can map how far water traveled before any cutting starts.
Thermal imaging. A thermal camera shows temperature differences across a ceiling or wall, which helps the crew spot cool, damp areas that do not show on the surface.
Cutting tools. Drywall saws and related cutting tools open neat, straight sections so damaged material comes out cleanly and new panels fit back in with tight seams.
Air movers. Air movers push dry air across open cavities and surfaces so trapped moisture releases instead of sitting inside the assembly.
Dehumidifiers. Dehumidifiers pull moisture out of the air in the drying area so the open cavity dries through, not just on the surface.
Texture matching tools. Sprayers, brushes, and hand tools re-create the ceiling or wall texture around the repair so the patched area blends with the rest of the surface.
Paint. Stain-blocking primer and matching paint finish the repair after the surface is dry, so the old water stain does not bleed through the new coat.
Frequently Asked Questions
No. Paint over a wet or damaged ceiling traps moisture, and the stain will bleed through regular paint. The correct sequence is: fix the source, dry the cavity with moisture verification, remove unsalvageable materials, apply stain-blocking primer to a dry surface, and repaint the full ceiling.
Stay out of the room, do not push on the sag, do not poke it, and do not stand under it. Move people, pets, and valuables out of the room. Switch off power to the room if you can do it safely. Call (480) 701-8249 immediately and tell the dispatcher the ceiling is sagging.
Only a moisture meter reading inside the cavity can confirm it. The crew takes readings at the same points throughout drying, and compares them to the dry standard baseline from unaffected materials in your home. Feeling the wall surface is not a measurement.
Yes, when the repair follows the full sequence: dry materials, matched texture applied with the correct technique, stain-blocking primer, and a full repaint of the ceiling or wall. Texture matching is a craft step, and it is part of the written scope, not an afterthought.
Extraction and opening happen on the first visit. Structural drying for most residential jobs takes 3 to 5 days of equipment run time with daily moisture checks. Rebuild follows once moisture readings confirm the structure is dry. The rebuild itself takes one to several days depending on the scope, because joint compound needs to cure between coats, and texture, primer, and paint each need drying time. Your written scope will include a timeline for your specific job.
Most standard homeowners policies cover sudden and accidental water damage, such as a burst pipe, a sudden AC overflow, or a sudden roof leak, including the resulting ceiling and wall repair. They generally do not cover gradual leaks that were ignored, or flood damage from outside rising water, which usually requires separate flood insurance. This is general information, not advice about your policy. Check your policy wording and ask your agent or adjuster.
An HVAC technician clears the drain line and services the drain pan and float switch. The restoration crew handles extraction, cavity drying, removal, and repair. Both jobs are needed. Drying should not start until the drain line is cleared.
A roofer fixes the entry point. The restoration crew handles extraction, cavity drying, removal, and repair. Drying should not start until the roof leak is repaired.
Call Now for Ceiling and Wall Water Damage Repair in Chandler
A ceiling stain is a warning, and a sagging ceiling is an emergency. Call RestoreNov now at (480) 701-8249 for live 24/7 ceiling and wall water damage repair across Chandler and the East Valley. Moisture mapping, controlled opening, moisture-verified cavity drying, drywall replacement, texture matching, and a full repaint, all handled as one job. If your ceiling is sagging right now, stay out of the room and call now.
Request a Call Back
Tell us what happened and where the water is. For emergencies, calling is fastest - a live person answers 24 hours a day.
Prefer to talk now?
Call (480) 701-8249 any time, day or night.
We serve Chandler and the East Valley: Downtown Chandler, Ocotillo, Fulton Ranch, Sun Groves, Tumbleweed Park, South Chandler, Gilbert, Mesa, Tempe, Queen Creek, Sun Lakes, Ahwatukee, and Higley.
Our address:
1651-1683 E Germann Rd, Chandler, AZ 85286
Send a Message
For immediate help, call (480) 701-8249. A live person answers 24 hours a day.
Online messaging is not connected yet. For immediate help, call (480) 701-8249.