
A refrigerator ice maker line is a quiet convenience and a quiet flood risk. Learn how these small lines fail, the damage they cause, and how to prevent it. The water line that feeds it is a thin tube, often plastic, running from a shutoff valve through a wall or along a baseboard to the back of the refrigerator. It sits under pressure around the clock, it is hidden behind one of the heaviest appliances in the house, and it is disturbed every time the refrigerator is moved for cleaning, flooring work, or remodeling. When it fails, it can leak for days or weeks before anyone notices.
Direct answer: Refrigerator ice maker line leaks happen when the thin supply tubing cracks, kinks, or loosens at a fitting, when the saddle valve or shutoff valve fails, when the inlet valve inside the refrigerator fails, or when the line is stressed by moving the refrigerator. Warning signs include water pooling behind or under the refrigerator, damp or warped flooring near the fridge, a musty smell, a water bill increase, an ice maker that produces less ice or stops, small or hollow ice cubes, and a dispenser that sputters. If you suspect a leak, shut off the refrigerator water supply valve, do not keep running the dispenser to test it, check the floor and wall behind the fridge, and call for help. Plastic tubing should be replaced with copper or braided stainless steel, and the line should be routed with gentle curves and a reliable shutoff valve.
This guide explains the parts of an ice maker water system, why each part fails, the warning signs, the checks you can run safely, the drying and repair process, and the upgrade and prevention routine that keeps a thin line from becoming a big flood.
How an Ice Maker Water System Works
The system is simple, which is part of why it is underestimated. A shutoff valve, often a saddle valve clamped onto a nearby cold water pipe, or a dedicated quarter-turn valve, feeds a supply line. The supply line runs to the back of the refrigerator and connects to the refrigerator inlet valve. The inlet valve opens on a signal from the ice maker or the dispenser and lets water flow into the ice maker mold or the dispenser. The ice maker cycles water into a mold, freezes it, and ejects cubes into the bin. The dispenser sends water through a filter and out the front of the door.
Every joint in that path is a potential leak point: the shutoff valve, the compression fitting at the valve, the tubing itself, the fitting at the refrigerator inlet valve, the inlet valve, the internal tubing inside the refrigerator, the filter housing, and the ice maker assembly. A failure at any joint sends water behind the refrigerator, where it pools on the floor, runs under flooring, and soaks the wall and baseboard.
The line is under pressure whenever the shutoff valve is open, which is almost always. Like a washing machine hose, it is stressed around the clock, even when the ice maker is not cycling. A slow leak at a fitting can run 24 hours a day, and a burst can release a large volume before anyone notices.
The Parts That Fail, and Why
Plastic supply tubing
The most common failure point is the supply tubing itself, especially the thin plastic tubing that was standard in many older installations. Plastic tubing degrades with age, heat, and pressure. It becomes brittle, cracks, and splits. It kinks when the refrigerator is pushed back too hard. It can be punctured by a staple, a screw, or a sharp edge during installation or remodeling. It can be crushed by stored items pressing against it.
Plastic tubing is inexpensive, and that is its only advantage. The standard upgrade is copper tubing or braided stainless steel tubing, both of which resist kinking, cracking, and puncture far better than plastic. If your refrigerator still has plastic tubing, replacing the line is one of the highest-value prevention steps in the kitchen.
Compression fittings
Compression fittings join the tubing to the valve and to the refrigerator inlet. A fitting can loosen over time, especially if the refrigerator has been moved. A ferrule, the small ring inside the fitting that seals against the tubing, can crack or deform. Over-tightening a compression fitting can crack the ferrule or the tubing end. Under-tightening lets the joint weep. A fitting that leaks often shows as a slow drip that leaves mineral deposits, corrosion, or a damp patch on the floor or wall behind the refrigerator.
Saddle valves
A saddle valve, also called a piercing valve, clamps onto a water pipe and pierces it with a needle to tap a water supply. Saddle valves are common in older ice maker installations because they are easy to install without cutting the pipe. They are also prone to leaking, clogging, and failing to close fully. The rubber gasket inside a saddle valve hardens with age. The needle can clog with sediment, especially in hard water areas. The valve may not shut off completely when you turn it, which means you cannot stop the water in an emergency. Many plumbers recommend replacing a saddle valve with a proper quarter-turn shutoff valve installed on a tee fitting, because a quarter-turn valve closes positively, seals reliably, and can be operated quickly in an emergency.
Shutoff valve
The shutoff valve for the refrigerator line may be under the sink, behind the refrigerator, in a basement or crawl space below, or on the cold water pipe near the refrigerator. A valve that is corroded, stiff, or leaking at the stem needs replacement before an emergency, not during one. If you cannot find the refrigerator shutoff valve, find it now, label it, and test it. A valve you cannot find in an emergency is almost as bad as no valve at all.
Inlet valve
The inlet valve inside the refrigerator, also called the water inlet valve or solenoid valve, opens and closes to let water into the ice maker and dispenser. A failing inlet valve can stick open, overfill the ice maker mold, and send water into the freezer or onto the floor. It can leak at its connections. It can fail to open, which stops ice production and reduces dispenser flow. Inlet valve failure often shows as water pooling under the refrigerator, ice cubes that are small or hollow, a dispenser that sputters, or an ice maker that stops producing ice. Inlet valve replacement is an appliance repair task.
Filter housing and filter
A refrigerator water filter can leak if it is not seated correctly, if the wrong filter is installed, if the filter housing is cracked, or if the filter seal is damaged. This is especially likely if the leak started soon after a filter change. If a leak starts right after a filter change, check the filter first. Reseat it, check the O-ring, and confirm you installed the correct filter for the model. If the correct filter still leaks after being reinstalled, the filter housing, O-ring, or an internal connection may be the problem.
Ice maker assembly
The ice maker itself can overflow or leak if an internal component fails. A cracked ice maker mold, a failed mold thermostat, or a jammed ejector can cause water to overflow during the fill cycle. Ice cubes that clump together in the bin, water collecting near the ice maker, and irregular ice production can all point to the ice maker assembly. Ice maker assembly issues are appliance repair tasks, and they still need drying if water reached the floor or wall.
Warning Signs: What to Look For
Watch for these signs, and act on the first one, not the fifth:
- Visible water pooling on the kitchen floor around or beneath the refrigerator, particularly after the ice maker has cycled
- Water staining, discoloration, or warping of flooring at the base of the refrigerator or beneath adjacent cabinetry
- Soft, spongy, or springy flooring when walking near the refrigerator, which means subfloor saturation has compromised the floor assembly
- A musty or mildew odor in the kitchen, particularly when the area beneath or behind the refrigerator is disturbed
- Visible mold growth at the base of kitchen cabinetry adjacent to the refrigerator, typically showing first as dark discoloration along the toe kick
- An unexplained increase in the monthly water bill that cannot be attributed to other usage changes
- An ice maker that produces less ice than usual or stops producing ice, which can mean the inlet valve is partially blocked or beginning to fail
- Ice cubes that are smaller than normal, hollow, or unusual in appearance, which can indicate inlet valve supply restriction that often precedes failure
- A dispenser that sputters, flows weakly, or stops, especially after a filter change
- Water staining on the ceiling of the room below the kitchen in a multi-story home
- Water behind the refrigerator, or a floor behind the appliance that stays wet
- A leak that increases when the water valve is turned on, which points to the supply line or a fitting
The timing clue matters. A leak that appears shortly after the refrigerator was moved for cleaning, flooring work, or remodeling often means the line kinked, loosened, or cracked when the unit was pushed back into place. A leak that starts right after a filter change points to the filter or filter housing. A leak that appears gradually, with no recent event, often means aging tubing or a fitting that has been weeping for weeks.
What to Check Yourself
You can run several safe checks without special tools. Do not pull the refrigerator out by force, and do not yank on the water line. Move the unit slowly, with a helper, and stop if the line feels tight.
Look behind and beneath the refrigerator
Pull the refrigerator out slowly, just far enough to see the floor and wall behind it. Look for standing water, dampness, staining, mold, mineral deposits, and corrosion. Feel the floor with a dry paper towel. Check the wall and baseboard behind the unit for discoloration or softness. If the floor behind the refrigerator is wet, note whether the water is fresh or whether the area shows old staining, because that tells you whether the leak is active or long-standing.
Inspect the supply line
Trace the supply line from the shutoff valve to the back of the refrigerator. Look for cracks, kinks, abrasion, brittleness, and loose fittings. Look for moisture or mineral deposits at each connection. Check that the line is not pinched between the refrigerator and the wall, and that stored items are not pressing on it. A line that hangs loosely can be stressed every time the refrigerator moves, so the line should be routed with gentle curves and supported so it does not dangle.
Check the shutoff valve
Locate the shutoff valve and confirm you can close it. Turn it slowly. If it is stiff, corroded, or leaks at the stem, do not force it. Note that it needs replacement and call a plumber. If the valve is a saddle valve, consider having it replaced with a quarter-turn valve on a tee fitting. If you close the valve and the leak stops, the supply line or a fitting is the source. If the leak continues with the valve closed, the water may be coming from inside the refrigerator, from the ice maker assembly, or from a different source entirely.
Check the filter
If the leak started after a filter change, remove the filter and reinstall it carefully, following the manufacturer instructions. Check the O-ring for damage. Confirm the filter is the correct model for the refrigerator. Run the dispenser briefly into a container and watch the filter housing for drips. If the filter housing itself is cracked or the O-ring is damaged, replace the affected part.
Check the ice maker and freezer
Open the freezer and look for water pooling in the ice maker area, ice that has fused into a solid mass, or water that has frozen in sheets on the freezer floor. Check the ice bin for clumped cubes. Check the dispenser chute for drips. These signs point to the ice maker assembly or the inlet valve, not to the supply line.
Do not keep testing the dispenser
Do not run the dispenser repeatedly to confirm a leak. Each test adds water to an already wet area. One confirmation is enough. Shut off the water and call for help.
What to Do When You Find a Leak
Shut off the refrigerator water supply at the valve if you can do so safely. If you cannot find the valve or it will not close, shut off the main water valve to the house. Do not enter standing water near electrical fixtures or outlets. If water is near the refrigerator electrical connection or an outlet, turn off power to the area from a safe location.
Move rugs, stored items, and contents out of the wet area if it is safe to do so. Place towels around the base of the refrigerator. Do not cut into drywall, flooring, or cabinetry to look for the leak. Wall and floor cavities can hold wiring and plumbing, and saturated materials need professional assessment.
Photograph and video the damage before anything is moved or cleaned. Capture wide shots of the kitchen, close-ups of the line, fittings, and valve, water levels, and damaged flooring and cabinets. Write down when you discovered the leak, what checks you ran, and what each check showed. This record supports the insurance claim and the restoration scope.
Call a plumber for the supply line, valve, and fitting repair, and an appliance technician if the failure is inside the refrigerator. Call a restoration team for the water damage. Extraction and drying can begin while the plumbing or appliance repair is scheduled.
The Professional Drying and Repair Process
Ice maker line leak restoration follows the same sequence as other kitchen water damage work.
Moisture mapping comes first. Technicians take moisture readings across the kitchen floor, inside cabinet bases, behind toe kicks, and in the wall behind the refrigerator, using pin and pinless meters. Thermal imaging maps the wet zone. The moisture map is essential because water from a refrigerator line runs under flooring, behind cabinets, and down into the subfloor, and the visible wet area is almost always smaller than the true wet area.
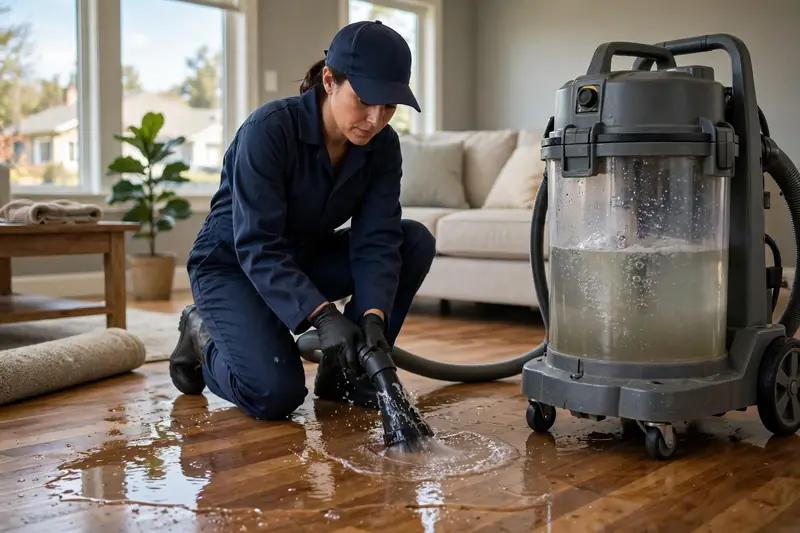
Extraction removes standing water. Contents are removed from wet cabinets. The refrigerator is not moved by the restoration team unless it has been disconnected, because the supply, drain, and electrical connections all attach to the unit. Once disconnected, the refrigerator can be pulled out to expose the floor and wall behind it for drying.
Drying uses commercial air movers and low-grain refrigerant dehumidifiers. Toe kicks and baseboards may be removed to allow airflow at the wall line and to check for moisture behind the trim. Cabinet boxes made of particle board or medium-density fiberboard that stayed wet often need removal, because these materials swell and do not dry back to their original dimensions. Technicians take daily moisture readings until the floor, subfloor, cabinet materials, and wall cavity reach their dry standard.
Cleaning and sanitizing depend on the water category. A supply line leak is clean water, Category 1. A leak that involved the ice maker and dispenser is still clean water, unless the water sat long enough to become contaminated. Affected surfaces are cleaned and treated with antimicrobial products where appropriate. Porous materials that cannot be reliably cleaned are removed.
Repair and rebuild follow once the structure is dry. Damaged cabinet bases, toe kicks, flooring, drywall, and paint are repaired or replaced. The supply line, valve, and fittings are replaced as part of the source repair. A rebuild that leaves the original plastic tubing and saddle valve in place invites a repeat leak.
Prevention: The Ice Maker Line Routine
Prevention is a short routine plus one upgrade.
Replace plastic tubing with copper or braided stainless steel. The typical plastic water supply line degrades and cracks. Copper and braided stainless steel lines offer far better durability. When the line is replaced, have the installer confirm the correct fittings, the correct length, and gentle routing with no sharp bends.
Replace a saddle valve with a quarter-turn shutoff valve on a tee fitting. A quarter-turn valve closes positively, seals reliably, and can be operated quickly in an emergency. Label the valve so anyone in the household can find it.
Check behind the refrigerator when you move it. Every time you pull the refrigerator out for cleaning, flooring work, or remodeling, inspect the floor and wall behind it, check the line for kinks and abrasion, and confirm the fittings are tight. Do not force the refrigerator back into place. If it pushes hard against the wall, it may be putting strain on the water line. Leave enough clearance so the line sits in gentle curves.
Install a water sensor behind the refrigerator. A sensor that sounds an alarm or sends a phone alert when it detects moisture catches a leak hours or days earlier than a stain does. A sensor behind the refrigerator is especially useful because nobody looks behind the refrigerator daily.
Replace the water filter on the manufacturer schedule, and use the correct filter for the model. A filter that is past its life can restrict flow, stress the inlet valve, and leak at the housing. When you change the filter, check the housing and O-ring for damage.
Know where the shutoff valve is, and make sure everyone in the household knows too. If you leave for an extended period, shut off the refrigerator water supply, or shut off the main water valve. The companion post on snowbird prevention covers the full departure checklist.
Chandler-Specific Notes
Chandler kitchens face a few local wrinkles. Hard water accelerates corrosion at fittings and shortens the life of rubber washers and valve seals, so fitting inspections matter as much as tubing inspections. Warm kitchens accelerate plastic tubing aging. Many Chandler homes have the refrigerator in a central kitchen location with cabinetry on both sides, which means a leak can soak two cabinet runs and the flooring in front of the unit before anyone notices. Tile floors, common in Chandler kitchens, can hide a slow leak longer, because tile does not show dampness the way drywall or carpet does, and water can run under tile and into adjacent rooms. A water sensor behind the refrigerator is especially useful in a tile kitchen.
FAQ
How do I know if my refrigerator water line is leaking?
Look for water pooling behind or under the refrigerator, damp or warped flooring near the fridge, a musty smell, a water bill increase, an ice maker that produces less ice or stops, small or hollow cubes, and a dispenser that sputters. Pull the refrigerator out slowly and check the floor and wall behind it.
Should I replace a plastic ice maker line with copper or braided stainless steel?
Yes. Plastic tubing degrades, cracks, kinks, and punctures more easily than copper or braided stainless steel. Replacing a plastic line is one of the highest-value prevention steps in the kitchen. Have the installer confirm the correct fittings and gentle routing.
What is wrong with a saddle valve?
Saddle valves clamp onto a pipe and pierce it with a needle. They are prone to leaking, clogging, and failing to close fully. The rubber gasket hardens with age, and the needle can clog with sediment. A quarter-turn shutoff valve on a tee fitting closes positively and seals reliably, and it can be operated quickly in an emergency.
Can I fix an ice maker line leak myself?
A homeowner can shut off the water, replace a filter, reseat a filter, and replace a supply line if they are comfortable with compression fittings and the manufacturer instructions. Valve replacement, inlet valve replacement, and ice maker assembly repair are plumber or appliance technician tasks. Drying the floor, subfloor, and wall cavity is a restoration task. Do not cut into drywall or flooring to look for the leak.
How long does drying take after an ice maker line leak?
It depends on the extent of saturation. A small leak caught early may need a few days of drying and minor repairs. A leak that soaked the subfloor, cabinet bases, and flooring can take a week or more, because drying, verification, and rebuild all take time. Proper drying cannot be rushed without risking mold or structural problems.
Will insurance cover an ice maker line leak?
Coverage depends on your policy, the cause, and whether the damage was sudden or the result of a long-term leak that went unrepaired. A sudden line failure is generally treated differently from a slow leak that soaked a wall for months. Document the timing, keep receipts, and confirm the details with your carrier. This post is general information, not insurance or legal advice.
Need Help With Water Damage in Chandler?
If you are dealing with this problem in your Chandler home, call RestoreNov at (480) 701-8249 for an assessment. See our Emergency Water Extraction and Structural Drying pages for how the work is handled.