
The short answer: Most Chandler homes keep the water heater in the garage, and a failed tank can release 40 to 50 gallons of water in minutes, with the supply line adding more until someone shuts off the water. The warning signs are rust colored water from hot taps, popping or rumbling sounds from the tank, a damp base or corroded fittings, visible pooling, reduced hot water, and a tank approaching or past 10 years old. In Chandler, very hard water accelerates the sediment and corrosion that cause tank failure, which makes annual flushing and anode rod checks essential. If your water heater is leaking, shut off power or gas and water to the unit if it is safe to do so, then call a plumber and call RestoreNov at (480) 701-8249 to handle the water damage.
Why the Garage Location Matters
In most Chandler homes, the water heater sits in the garage. That placement feels safe, because a garage is not a living space. But the garage location creates a specific flood pattern that catches homeowners by surprise.
A garage floor is concrete, often at or near the same level as the driveway, with a door seal that is designed to keep out dust and pests, not to hold back water. When a tank ruptures, water spreads across the garage floor, soaks everything stored at floor level, and finds its way to the lowest points: the door thresholds, the expansion joints, and the wall shared with the living space.
That shared wall is the critical path. Drywall on the garage side wicks water upward. Insulation inside the wall absorbs it. The moisture travels through the wall cavity and can reach the living space side, the flooring in the adjacent room, and the baseboards. A homeowner who sees "just a wet garage" may not realize that the wall cavity is soaked and that mold conditions are developing inside it.
The garage also stores the items most vulnerable to water damage: cardboard boxes on the floor, tools, paint, chemicals, seasonal decorations, and often a second refrigerator or freezer. A water heater flood does not just wet the floor. It destroys what is stored on it, and it can damage appliances, electrical outlets, and the water heater's own gas or electrical connections.
Finally, garages are the least visited rooms in many homes. A homeowner may walk through the garage once a day, or less. A slow leak from a water heater can run for days before anyone notices it, especially if the leak is on the back side of the tank facing the wall. By the time the puddle is visible from the garage door, the damage is already significant.
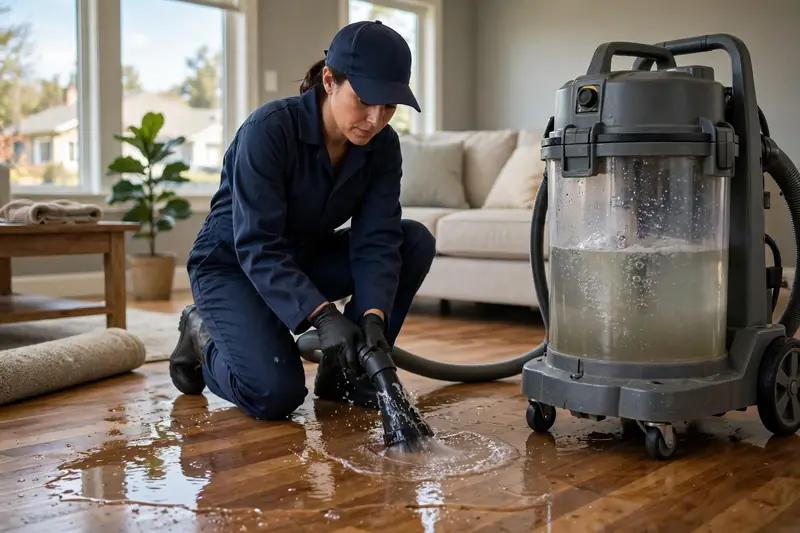
How a Water Heater Fails
A conventional tank water heater is a steel tank lined with glass, with a heating element or burner, an anode rod, and a temperature and pressure relief valve. It fails in predictable ways, and understanding the mechanisms helps you catch the failure before it becomes a flood.
Internal corrosion. The steel tank is protected by a glass lining and by the anode rod, a sacrificial metal rod that corrodes first to protect the tank. Over time, the glass lining develops microscopic cracks, and the anode rod is consumed. Once the anode rod is gone, the tank itself begins to corrode. Rust forms, the tank wall thins, and eventually it develops a pinhole leak or a seam failure. Internal corrosion is the most common cause of catastrophic tank failure, and it is invisible from the outside until the leak appears.
Sediment buildup. In Chandler's very hard water, calcium and magnesium settle at the bottom of the tank as sediment. That sediment hardens into a layer that insulates the water from the heat source. The burner or element must work harder, the tank bottom overheats, and the metal stresses and cracks. Sediment also buries the lower element in electric heaters, causing it to overheat and fail. Our article on hard water pipe corrosion in Arizona homes explains how 12 to 17 grains per gallon water accelerates sediment formation.
Temperature and pressure relief (T and P) valve failure. The T and P valve is a safety device that releases water if the tank pressure or temperature gets too high. If the valve fails, or if the thermostat fails and the tank overheats, pressure builds until the tank fails. A T and P valve that drips constantly is a warning sign. Never cap or plug a T and P valve to stop dripping. It is the only thing standing between a pressurized tank and a rupture.
Fitting and connection leaks. Leaks at the cold water inlet, the hot water outlet, the drain valve, or the T and P valve are common and are usually repairable. But a fitting leak that is ignored can drip for months, corrode the tank jacket, and hide a larger problem. Water runs downhill, so a drip from a fitting at the top can pool at the base and look like a tank failure. Tracing the leak to its source matters, because a fitting leak is a repair and a tank leak is a replacement.
Thermal expansion stress. Every time the tank heats water, the water expands and the tank flexes. Over thousands of cycles, that flexing stresses seams and welds. Homes with high water pressure or a failed pressure regulator put additional stress on the tank with every cycle.
The Warning Signs, Earliest to Latest
Water heaters rarely burst without giving notice. The tank usually shows physical changes weeks or months before a major failure. Recognizing them allows you to act before gallons of water flood your garage.
Rust colored water from hot taps. This is often the earliest sign of internal tank corrosion. If hot water runs rusty or discolored for a moment when you first open the tap, and cold water runs clear, the corrosion is in the water heater or the hot water lines. If both hot and cold run discolored, the source may be the municipal supply or a different pipe. Hot only discoloration points to the tank.
Popping, rumbling, or banging sounds. A loud popping or rumbling sound when the burner turns on means heavy sediment buildup. Minerals at the bottom of the tank harden, and as the burner heats that layer, pockets of steam bubble up and explode through the sediment. That overheating stresses the metal tank, leading to microcracks that eventually cause leaks. In electric models, sediment buries the heating element, forcing it to heat a layer of rock before it touches water.
A damp base, corroded fittings, or visible pooling. Even a small puddle at the base warrants immediate investigation. Check whether the water is coming from a fitting, the drain valve, the T and P valve, or the tank itself. Use the paper towel test: dry the area, place dry paper towels around the base and fittings, and check them after an hour to trace where the water is coming from. A puddle that reappears after drying is an active leak, not condensation.
Rust streaks or corrosion on the tank. Rust streaks running down the side of the tank, or forming on the top near the draft hood on a gas heater, indicate that corrosion is eating through the metal from the inside out. Surface rust on the jacket is cosmetic. Rust streaks from seams, welds, or the base are structural.
Reduced hot water volume or inconsistent temperature. Internal sediment displaces water, so a tank with heavy sediment holds less hot water. A failing element or thermostat causes temperature swings. Both signal the same aging process that eventually causes a leak.
A tank approaching or past 10 years old. Age alone does not mean imminent failure, but it turns any other symptom from a minor concern into an urgent one. A 12 year old tank with rusty water is a replacement waiting to happen. A 4 year old tank with rusty water is a problem to investigate. Check the manufacturer's label on the tank for the installation date or the serial number, which often encodes the manufacture date.
Chronic pilot light outages on gas heaters. If you find yourself relighting the pilot light repeatedly, the thermocouple sensor may be failing. The thermocouple shuts off the gas supply if it does not sense a flame, which is a safety function. A failing thermocouple is a cheap part to fix, but repeated outages signal that the unit needs professional attention.
What To Do the Moment You Find a Leak
Follow these steps in order. The sequence protects your safety first, then your property.
1. Turn off power or gas, if it is safe to do so. For an electric unit, go to the main electrical panel and flip the dedicated breaker to OFF. For a gas unit, turn the dial on the gas control valve to the OFF position. Do this only if you can reach the controls without standing in water. Never touch electrical equipment while standing in water.
2. Shut off the water to the unit. Look at the top of the tank for the incoming cold water pipe. Turn that valve clockwise, or flip the lever, until it stops. This cuts off the supply that feeds the leak. If the cold water valve is stuck or corroded, shut off the main water valve to the house.
3. Open hot faucets to relieve pressure. Go to the nearest sink or bathtub and turn the hot water faucet all the way on. This lets air into the plumbing lines, breaks the vacuum, and relieves built up pressure in the tank.
4. Drain the tank if it is actively dumping water. Screw a garden hose onto the brass drain valve at the bottom of the tank and run the other end out to the driveway or a floor drain. Open the valve slowly. Hot water can scald, so keep people and pets away from the discharge. Do not drain a tank that is still powered or heated.
5. Move belongings off the garage floor. Cardboard boxes, tools, paint, and anything stored at floor level should be moved to dry ground. Cardboard that has absorbed water is a mold food source and should be discarded if it was soaked.
6. Document the damage. Photograph the tank, the leak point, the water line on the floor and walls, and any damaged belongings. Keep the plumber's invoice and the replacement information. If you file an insurance claim, this documentation is what your adjuster needs. See our guide to water damage insurance claims in Arizona for what to document and how.
7. Call a plumber and a restoration team. The plumber replaces or repairs the water heater. The restoration team handles the water damage: extraction, moisture mapping, drying, and removal of unsalvageable materials. Both are needed. A new water heater does not dry the wall cavity, and drying does not fix the heater.
The Water Damage a Failed Heater Causes
A water heater flood is a Category 1 clean water loss at the moment of failure, which means materials can usually be dried in place if extraction and drying start promptly. But the damage pattern is specific to the garage location, and it is easy to underestimate.
Garage floor and walls. Water spreads across the concrete floor and soaks the bottom of the drywall on all garage walls, especially the shared wall with the living space. Drywall wicks moisture upward, often 12 to 24 inches above the visible water line. Baseboards absorb water and swell. Insulation inside the wall cavities absorbs water and holds it against framing.
Adjacent living space. If the shared wall is wet, the living space on the other side is at risk. Flooring in the adjacent room can absorb moisture through the slab and the wall base. Carpet, laminate, and engineered wood in the adjacent room should be checked with moisture meters, even if they look dry.
Stored belongings. Cardboard boxes, fabrics, paper, and electronics stored on the garage floor are often destroyed. Items on shelves above the water line may survive, but they should be checked for moisture and mold if the garage stayed humid for an extended period.
Appliances and electrical. Water near electrical outlets, the garage door opener, a second refrigerator, or a freezer is a safety hazard. Do not touch wet electrical equipment. Have an electrician inspect outlets and appliances that were submerged before using them again.
Mold risk. Mold can begin growing within 24 to 48 hours on wet drywall, insulation, and cardboard. A garage that is closed up and warm after a flood is an ideal mold environment. That is why drying must start quickly and be verified with meters, not by how the floor feels. Our article on the mold 24 to 48 hour window explains the timeline, and our article on how long structural drying takes explains the drying process.
How Professional Restoration Works for a Water Heater Flood
The restoration process for a water heater flood follows the same principles as any clean water loss, with attention to the garage specific pattern.
First, the technician maps moisture in the garage floor, the walls, the shared wall cavity, and the adjacent living space. Thermal imaging reveals how far water traveled inside the shared wall, which is the area most homeowners miss.
Next, standing water is extracted, and any drywall that is soft, swollen, or contaminated is cut out in clean lines. Wet insulation is removed, because soaked insulation cannot be dried effectively in place and holds moisture against framing. Baseboards that absorbed water are removed.
Then, air movers and dehumidifiers dry the remaining structure. In a garage, airflow must reach the wall cavities and the slab. Drying typically takes 3 to 5 days for a water heater flood, verified with daily meter readings. The shared wall cavity is the slowest to dry, because it is enclosed.
Finally, once readings confirm the structure is dry, repairs begin: new drywall, taping and mudding, texture matching, paint, and baseboards. The repair is a separate phase from the drying, and it should never start before drying goals are met.
Our emergency water extraction service handles the water removal, and our structural drying and dehumidification service handles the drying phase.
Prevention: Making Your Next Water Heater Last
The best water heater flood is the one that never happens. Prevention is a maintenance program, not a single action.
Flush the tank annually. Draining and flushing the tank removes sediment before it hardens. In Chandler's very hard water, annual flushing is not optional. It is the difference between a heater that lasts and one that fails early. If you have never flushed your tank, have a plumber do the first flush, because a tank with heavy sediment may need professional handling.
Check the anode rod every few years. The anode rod is a sacrificial component that protects the tank by corroding first. When it is gone, the tank corrodes next. Have a plumber inspect the anode rod every 3 to 5 years and replace it if corroded. Replacing an anode rod is far cheaper than replacing a tank, and it extends the tank's life significantly.
Test the T and P valve yearly. Lift the valve lever briefly to confirm it releases water and reseats properly. If it drips constantly, sticks, or does not release, have it replaced. Never cap or plug the valve.
Inspect visible components regularly. A monthly glance at the base of the tank catches most problems before they become floods. Look for pooling, rust streaks, corroded fittings, and dampness. Check the drain valve and the T and P valve discharge pipe. If you see water where it should not be, investigate.
Keep the area around the heater clear. Do not stack boxes against the tank. Clear access lets you see a leak early and lets a plumber service the unit without moving a season of storage first.
Know the age of your tank. If your tank is approaching or past 10 years old, start planning for replacement. A planned replacement on your schedule is far cheaper and less disruptive than an emergency replacement after a flood. If an older tank shows any warning sign, do not wait for the next sign.
Install a drain pan and a leak detector. A drain pan under the water heater, plumbed to a drain, catches slow leaks and routes them away from the floor. A water leak detector with an alarm, or an automatic shutoff valve that closes the water supply when it detects a leak, turns a potential flood into a service call. Ask your plumber about these options, especially if your heater is in a garage with a shared living space wall.
Consider a tankless upgrade when replacement time comes. Tankless water heaters do not store 40 to 50 gallons of water, so they cannot release a tankful in a flood. They have their own maintenance needs, including descaling in hard water, but they eliminate the catastrophic tank rupture scenario. Discuss the tradeoffs with your plumber when your current tank reaches end of life.
Frequently Asked Questions
How much water does a failed water heater release?
A standard residential tank holds 40 to 50 gallons, and a ruptured tank can release most of that in minutes. The supply line continues adding water until someone shuts off the water to the unit or the main valve. That is why shutting off the water quickly is the most important step after safety.
Is a leaking water heater an emergency?
Yes, if the tank itself is leaking. A tank leak means the tank has corroded through, and it will not heal. It will get worse, and it can fail catastrophically. A fitting leak is less urgent but should still be fixed promptly. If you see pooling at the base of the tank, treat it as urgent.
Can a leaking water heater be repaired, or does it need replacement?
It depends on the source. A fitting leak, a drain valve leak, or a T and P valve leak can often be repaired. A tank leak, meaning water coming from the tank itself through a seam, weld, or corroded spot, cannot be repaired. The tank must be replaced. A plumber can determine the source.
Does homeowners insurance cover water heater flood damage?
Often, yes, when the failure is sudden and accidental. The water damage to floors, walls, and belongings is typically covered. The cost of replacing the water heater itself may or may not be covered, depending on the policy and the cause. A slow leak from neglected maintenance is often excluded. See our guide to water damage insurance claims in Arizona for the details.
How do I know if my water heater is about to fail?
The warning signs are rust colored water from hot taps, popping or rumbling sounds, a damp base or corroded fittings, visible pooling, reduced hot water volume, and a tank approaching or past 10 years old. Any one of these signs deserves attention. Two or more together mean you should call a plumber promptly.
Should I drain my water heater myself?
If the tank is actively leaking and you are comfortable doing so safely, draining it through the drain valve with a garden hose can reduce the flooding. Turn off power or gas first, shut off the water supply, and be careful of hot water. If you are unsure, or if the tank is in a dangerous condition, leave it to the plumber. Do not drain a tank that is still powered or heated.
Can hard water really destroy a water heater?
Yes. Chandler area water at 12 to 17 grains per gallon deposits sediment rapidly inside the tank. Sediment insulates the water from the heat source, forces the heater to work harder, overheats the tank bottom, and accelerates corrosion. Annual flushing and anode rod checks are essential in very hard water. See our article on hard water pipe corrosion in Arizona homes for the full picture.
What should I do with items stored in a flooded garage?
Move them to dry ground immediately. Cardboard boxes that absorbed water should be discarded, because cardboard is a mold food source and cannot be restored. Fabrics and papers that got wet should be dried quickly or discarded. Electronics and appliances that were submerged should be inspected by a professional before use. Photograph damaged items before discarding them, for insurance documentation.
---
Need Help With Water Damage in Chandler?
If you are dealing with this problem in your Chandler home, call RestoreNov at (480) 701-8249 for an assessment. See our Emergency Water Extraction and Structural Drying pages for how the work is handled.